DIY: Chevron Thread Bracelet
You may already know that I love thread bracelets. I am making them, giving them, and most of all, wearing them. If last time, I made Spiral Thread Bracelet, today, I’ll teach you how to make Chevron Thread Bracelet. I admit that I found it quite complicated to make but once I understood the process, it’s a piece of cake for me. Well, I hope that my students here will feel the same way after this. But I’m telling you that finishing one is worth it since the pattern, chevron never go out of style. They’re a fun accessory which can be added to any outfit. Aside from that, they’re fun friendship bracelets to give. Come on. My excitement is mounting.
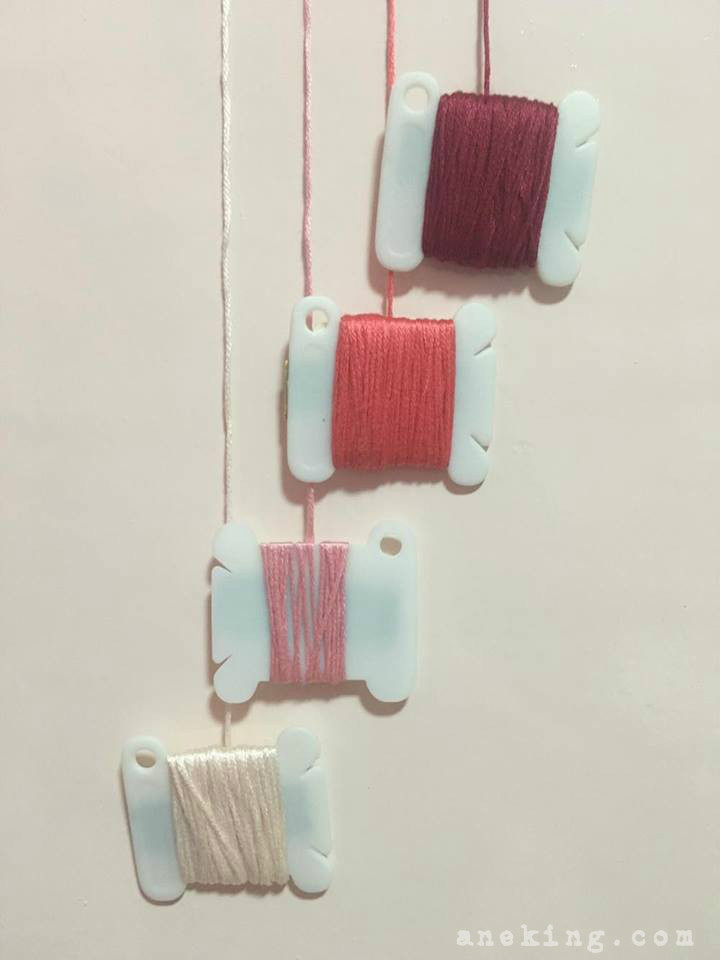
http___www.bigleaguekickball.com_about_ Buy Soma no script next day delivery 1. Prepare the embroidery floss needed in any color and in any number as long as you can manage all of those. I chose four shades of red since I’m planning to give a gradient effect on the chevron pattern. Of course, we will also be needing scissors or fasteners or buttons.
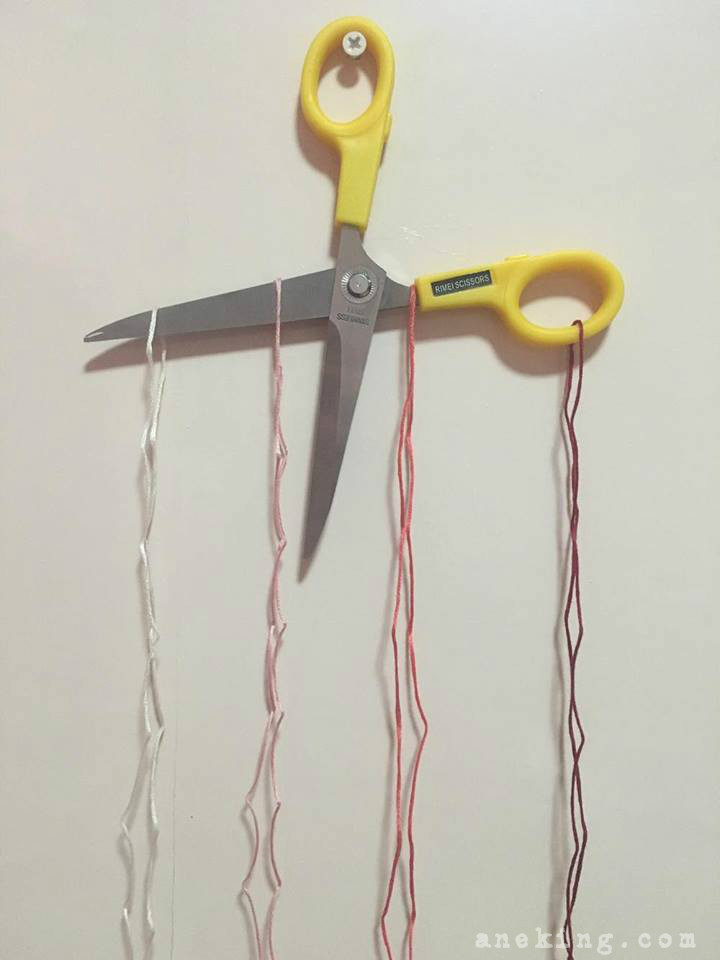
online soma fedex next day delivery 2. Cut each thread 50 to 60 inches depending on the measure of your wrist.
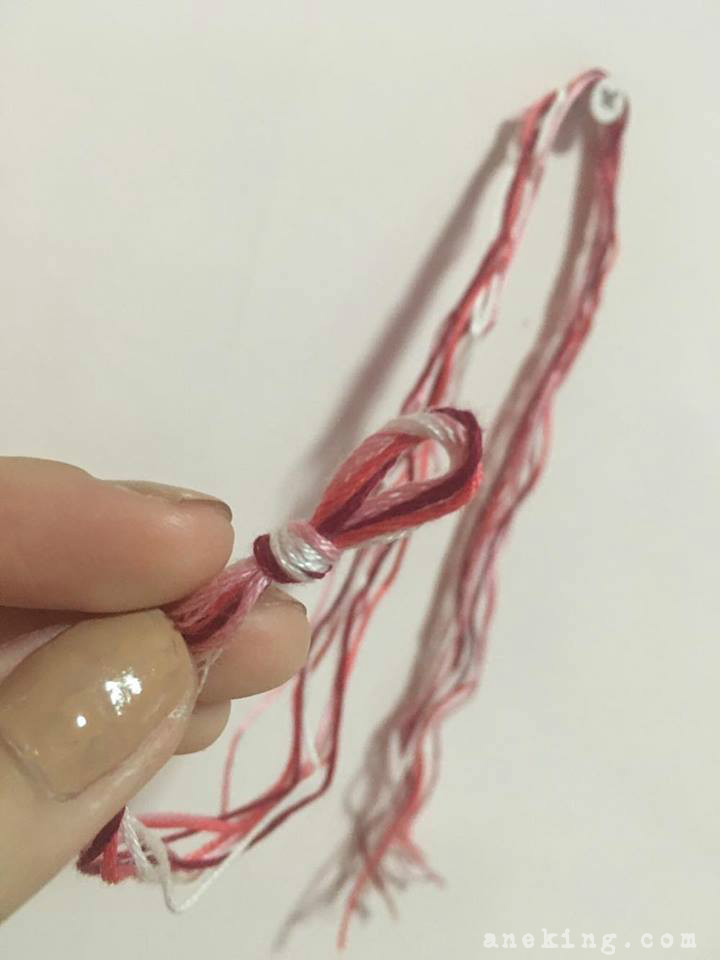
3. Fold the combined threads halfway and make a knot at the center.
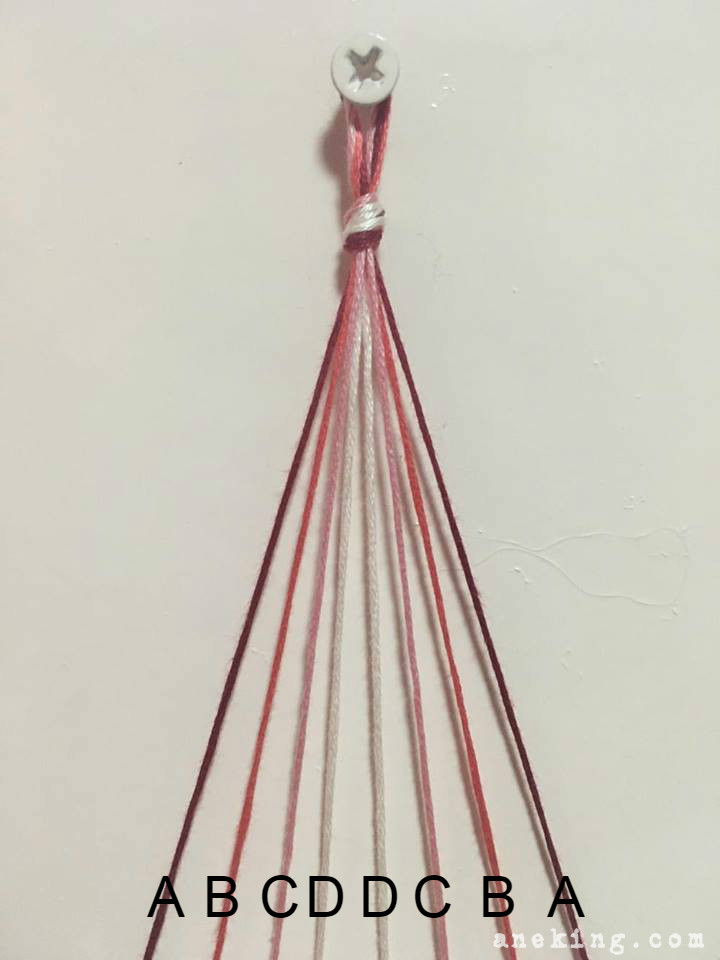
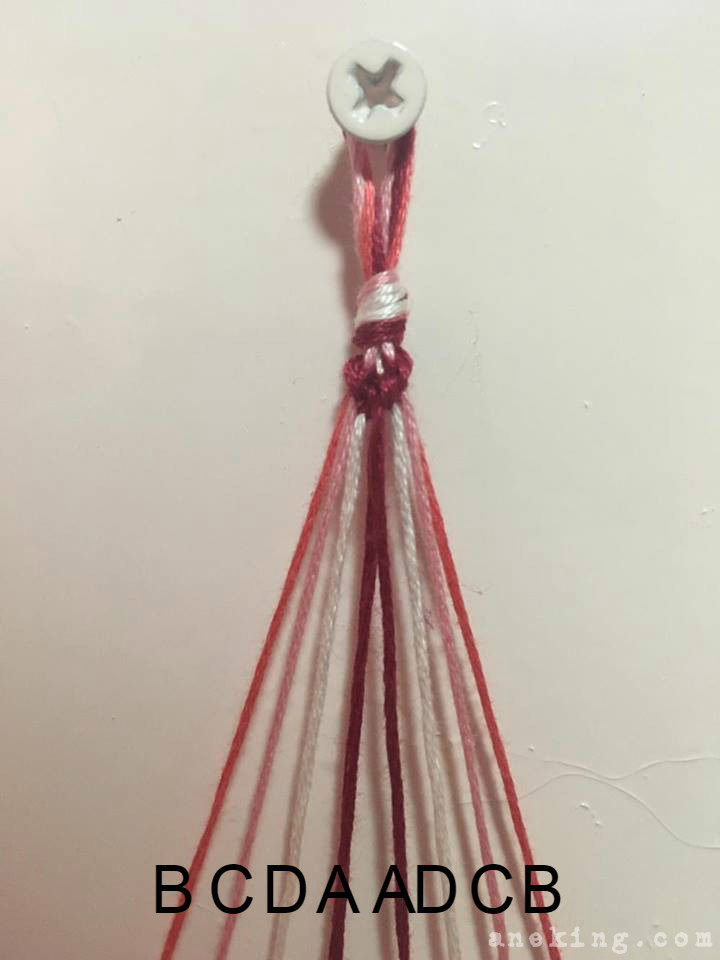
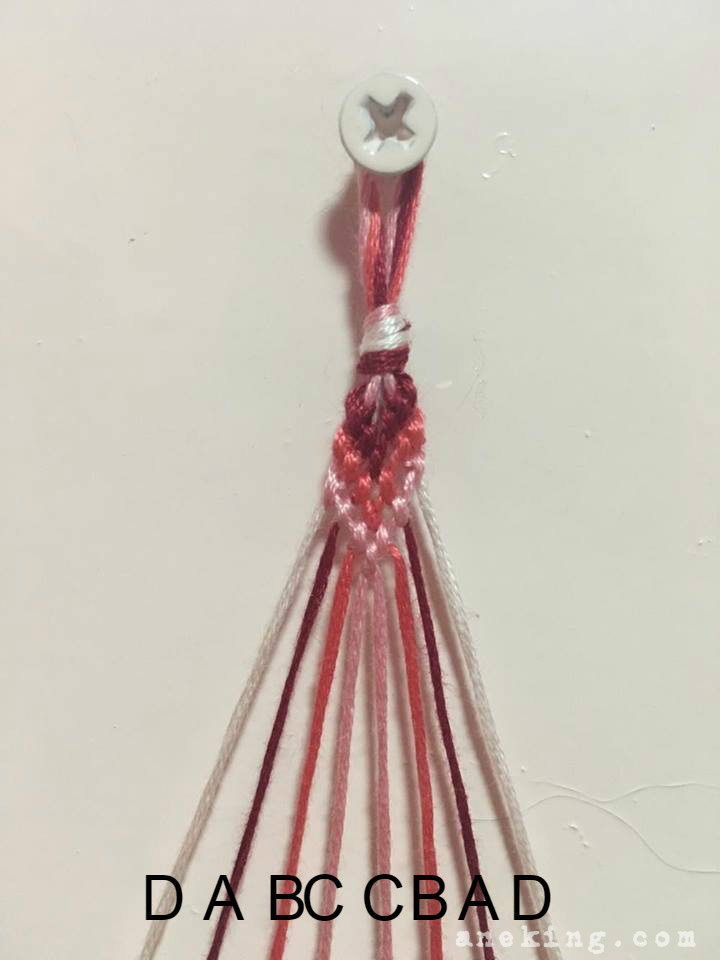
4. Hang the loop made on a fixed nail or fasten these threads somewhere to weave them properly. The arrangement of the colors should be mirrored. If the arrangement of colors on the left side is thread A, thread B, thread C and thread D from left to right, then the arrangement of colors on the right is thread D, thread C, thread B and thread A from left to right. For clearer instructions, A, B, C and D are labeled on the photo below.
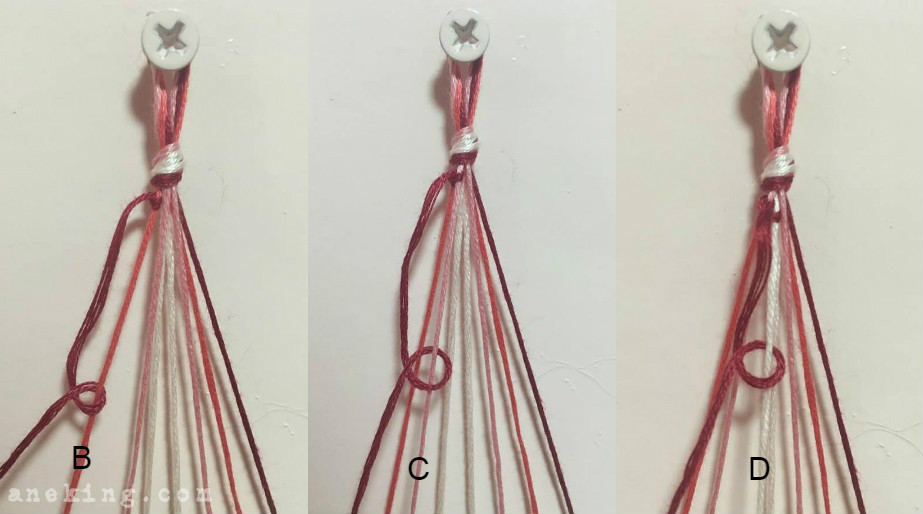
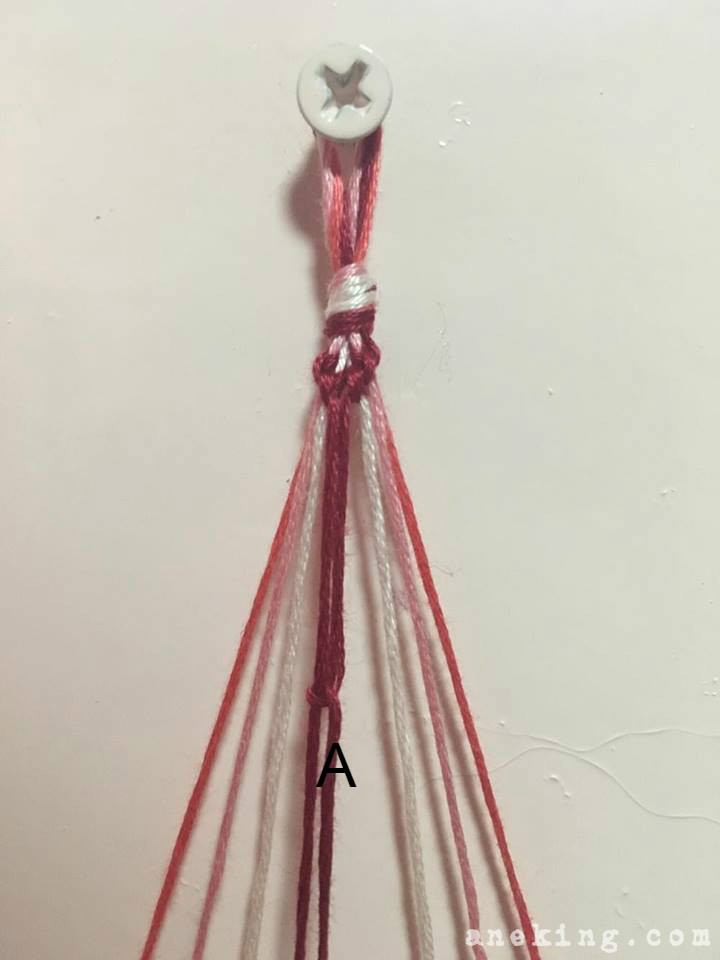
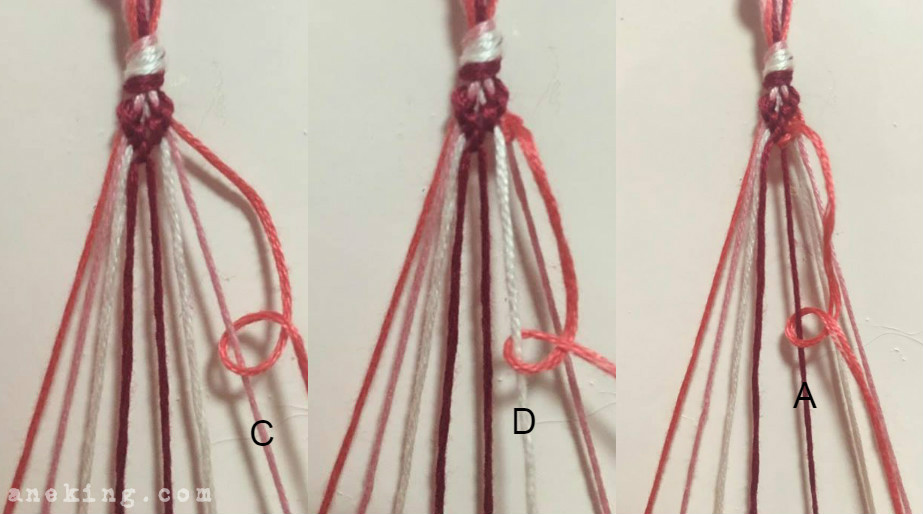
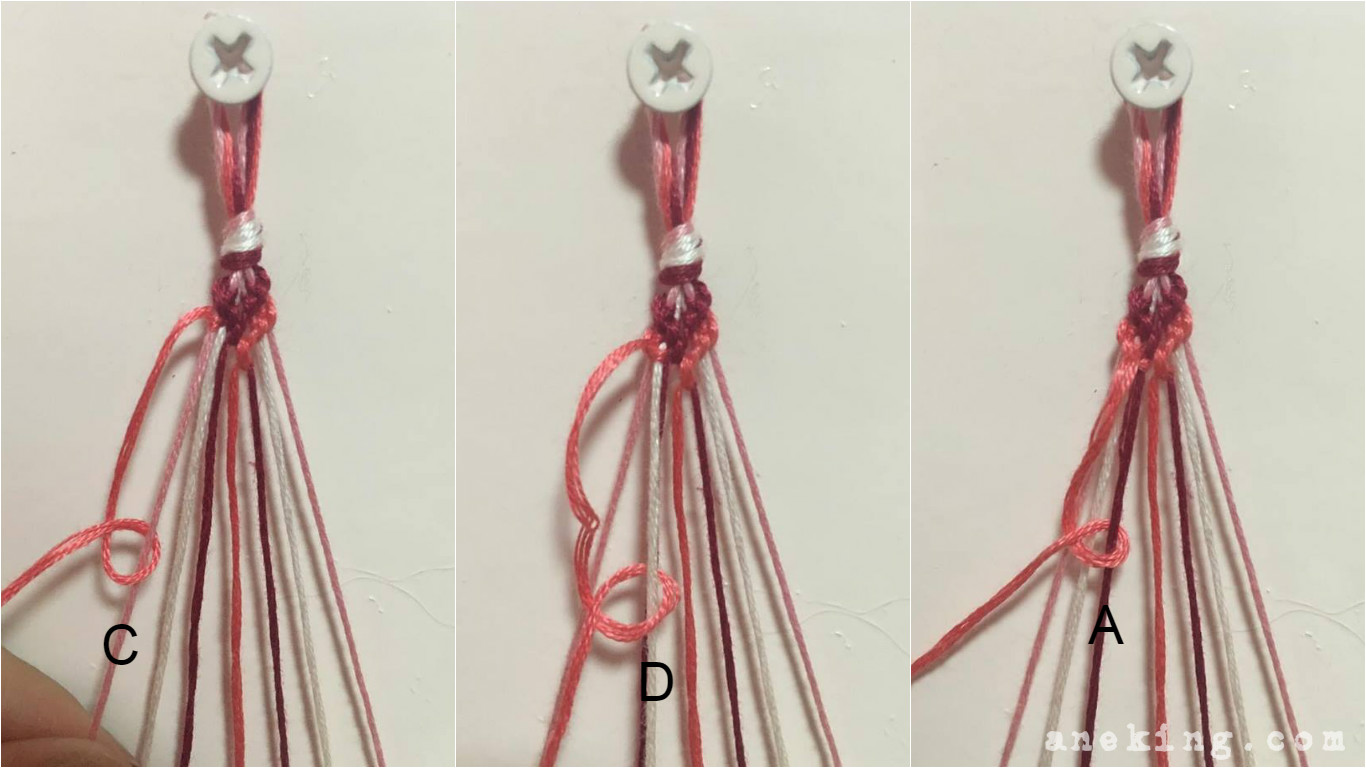
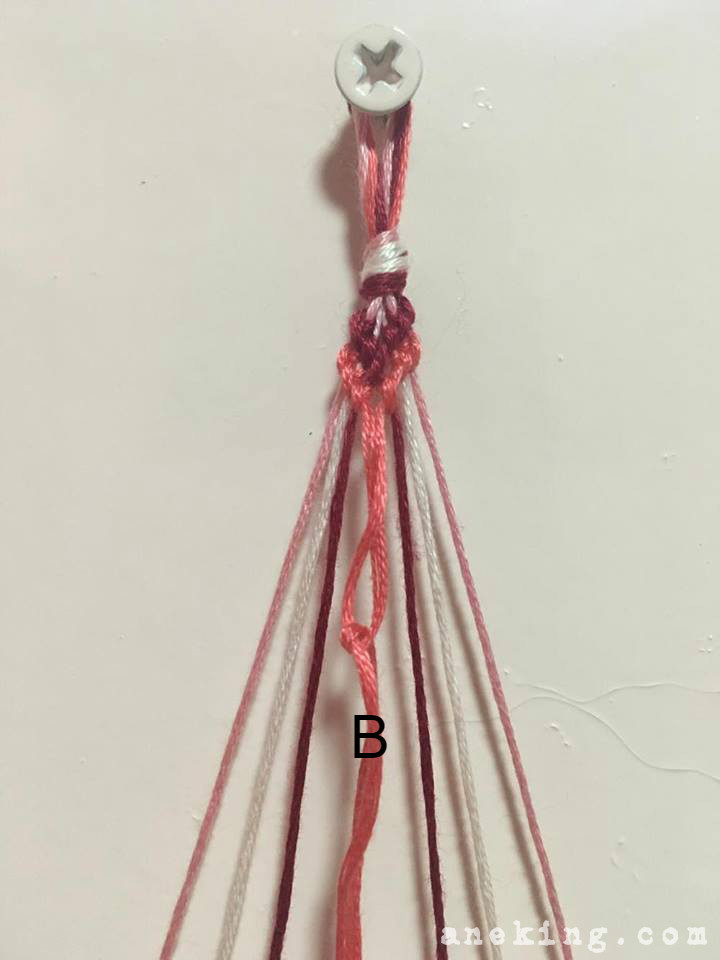
5. Start the bracelet by creating knots on threads B, C and D consecutively using thread A. In tying, make sure that thread A passes on top of thread B before looping downward so that you’ll get the edge of thread A from the hole on the left side of thread B upward. It’s a must to knot twice on each thread. Tighten the knots and pull them upward. The same goes with threads C and D.
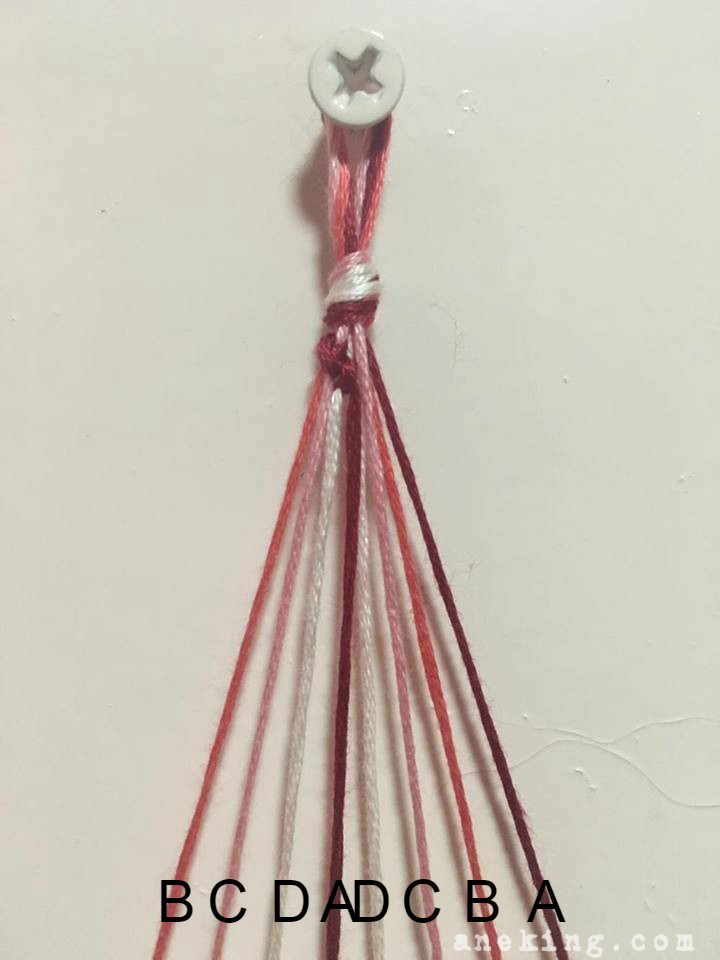
6. After doing the previous step, your unfinished bracelet should look like this. The new arrangement from left to right is thread B, thread C, thread D, thread A, thread D, thread C, thread B and thread A.
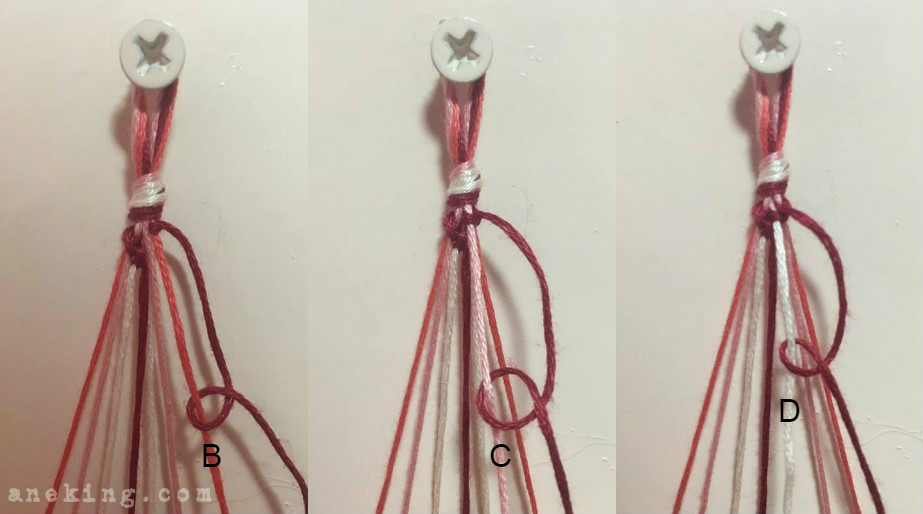
7. Let’s proceed on the right side. Since the left is the mirror of the right, you should also mirror the things you done on step five. Create knots on threads B, C and D consecutively using the outermost thread which is thread A. Make sure that thread passes over thread B before looping downward so that you’ll get the edge of thread A from the hole on the right side of thread B upward. Don’t forget to make two knots on each thread. Tighten the knots and pull them upward. The same goes with threads C and D.
8. After doing the previous step, your unfinished bracelet should look like this. The first layer of the chevron pattern can be seen. It’s again mirrored which is arranged from left to right as thread B, thread C, thread D, thread A, thread A, thread D, thread C and thread B from left to right.
9. Lock the first layer of the chevron pattern by tying the two thread As in the middle twice.
10. Let’s make another layer before I leave you on your own, but for now, let’s begin with the right side. You can start with either side, anyway. Just like in step 7, Create knots on the middle threads using the new outermost thread, which is thread B. Make the first knot by passing thread B on top of thread C, loop it downward and get the edge of thread B from the hole on the right side of thread C upward. Tighten the knots and pull them upward. Remember to make two knots on thread C and then on thread D and lastly on thread A.
11. Mirror what you have done on the right. Create two knots on the middle threads using the new outermost thread, which is thread B. Make the first knot by passing thread B on top of thread C, loop it downward and get the edge of thread B from the hole on the left side of thread C upward. Tighten the knots and pull them upward. Remember to make two knots on thread C and then on thread D and lastly on thread A.
12. After doing the previous steps, the unfinished bracelet should look like this: thread C, thread D, thread A, thread B, thread B, thread A, thread D and thread C fro left to right. As seen, the second layer of the chevron patter is formed. To lock it, tie the two thread Bs twice.
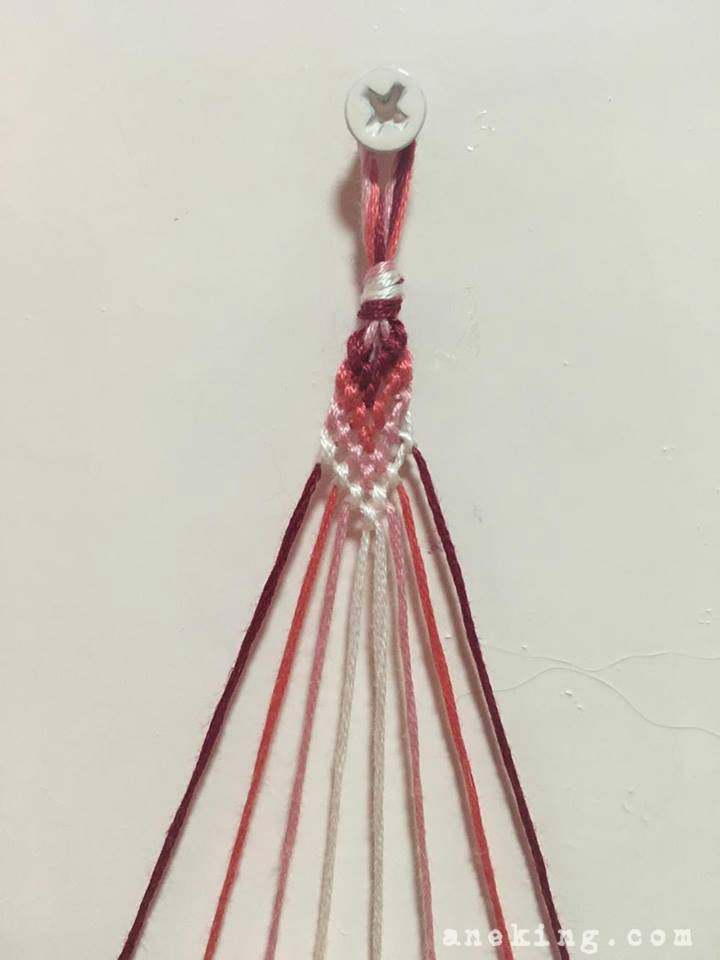
13. Continue working on third layer of chevron pattern colored with thread C by following the steps 10 and 11. Remember to tie each thread twice and end it by locking the middle threads. The new arrangement is thread D, thread A, thread B, thread C, thread C, thread B, thread A and thread D from left to right.
14. Do the same thing when the outermost thread is thread D. After tying thread D to threads A, B and C twice consecutively and locking the layer twice, the arrangement is back to the first one which is thread A, thread B, thread C and thread D from left to right, then the arrangement of colors on the right is thread D, thread C, thread B and thread A from left to right.
15. Continue making the same process until you reach your desired length for your bracelet. End by knotting all of the threads at once.
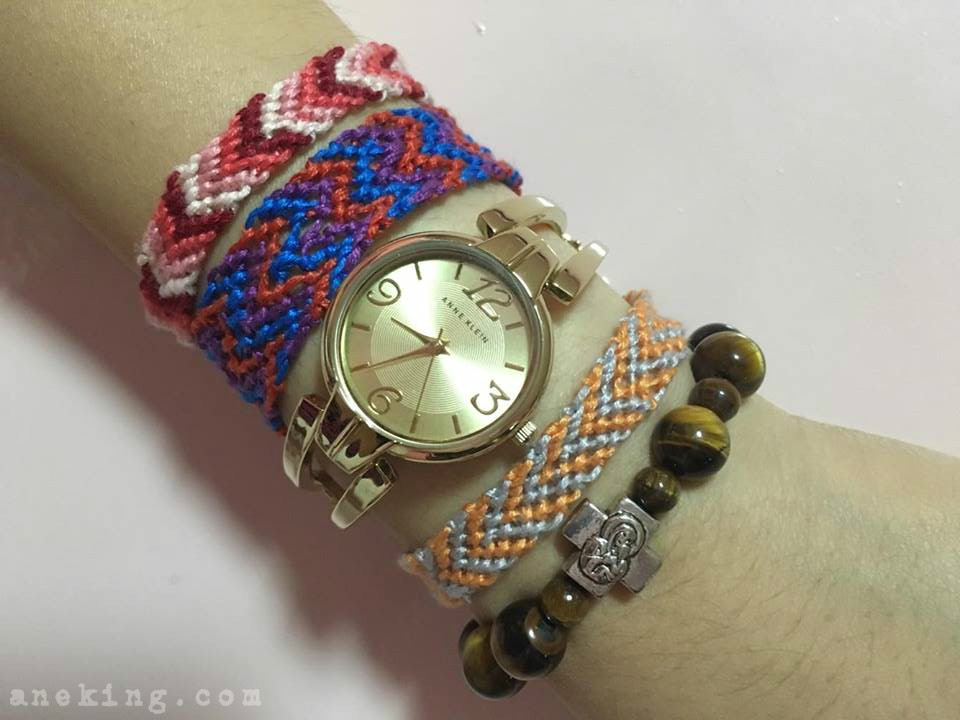
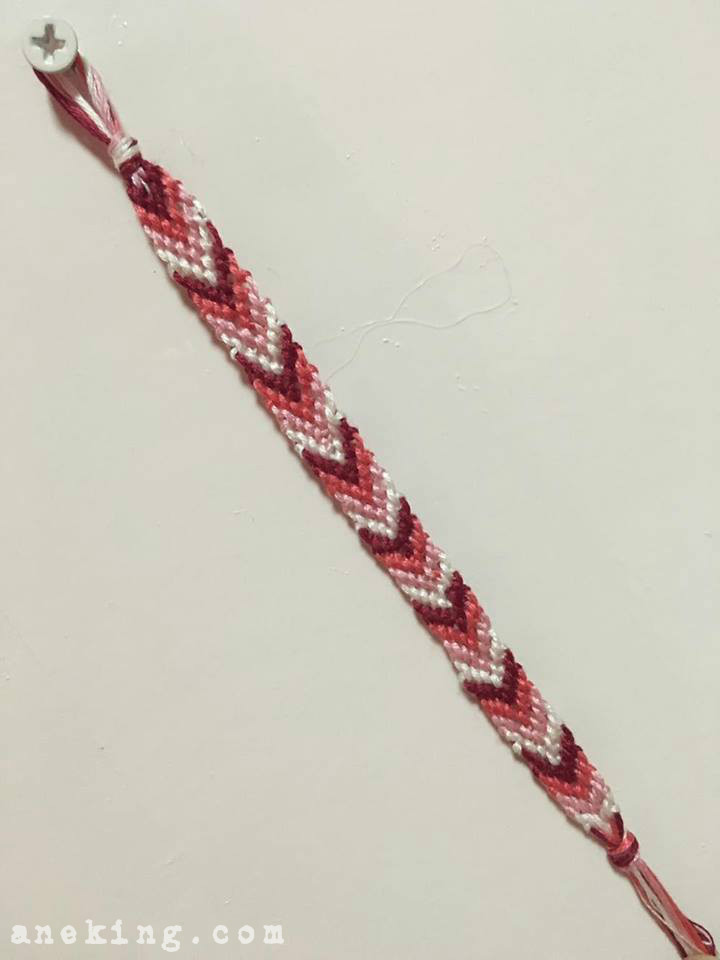
16. Your chevron thread bracelet is now done and ready to be used. As you can see, I also made chevron thread bracelet with two colors and double chevron thread bracelet with three colors. If you fully understand how this one is made, then these two will be easy for you.



This bracelet is amazing!
IKR!